How to remove ceramic tiles: A pro guide for DIY renovation
Tackling a ceramic tile removal project means getting your hands on the right gear. It's a job that demands a smart mix of leverage, brute force, and most importantly, solid safety equipment. You'll be breaking up tiles and scraping away old, stubborn adhesive, so your toolkit will range from a basic hammer and chisel to some serious power tools.
Before anything else, safety is the absolute top priority. We're talking about protecting your eyes from sharp, flying shards and keeping hazardous silica dust out of your lungs.
Gathering Your Tile Demolition Toolkit
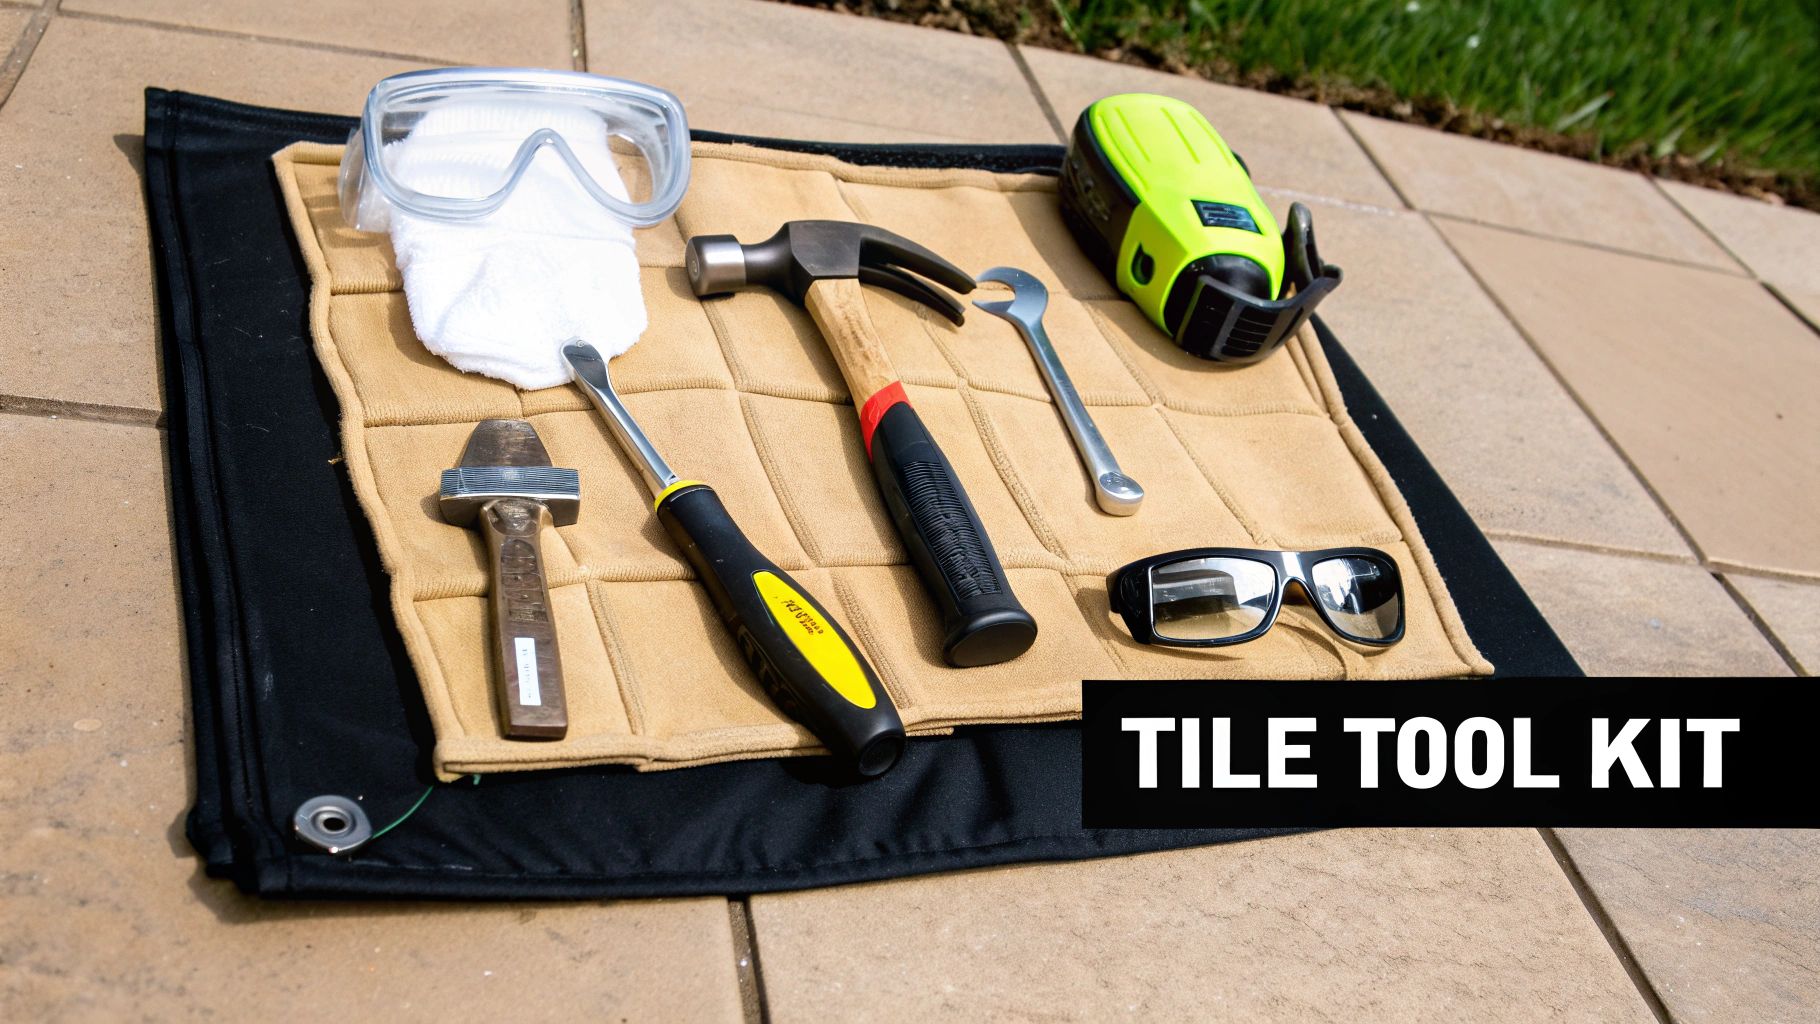
Before you even think about swinging that first hammer, getting your tools and personal protective equipment (PPE) lined up is the most important step you'll take. Having everything you need from the get-go saves you from those frustrating mid-project runs to the hardware store and lets you work efficiently and safely. The goal here is simple: be ready for both the tile and whatever stubborn mortar is hiding underneath.
Essential Safety Gear You Cannot Skip
Let's start with the gear that's completely non-negotiable. Tile demolition is a messy, hazardous business. You've got sharp tile fragments that can cause nasty cuts and dust that poses a very real health risk.
- Impact-Rated Safety Glasses or Goggles: Your regular glasses won't cut it. You need proper eyewear that can take a direct hit from a flying piece of ceramic without shattering.
- Heavy-Duty Work Gloves: A good pair of leather or reinforced synthetic gloves will save your hands from sharp edges and a world of blisters.
- N95 or P100 Respirator: This might just be the most critical piece of safety gear on the list. When you break up ceramic tile and the cement-based thin-set mortar, you release fine crystalline silica dust. If you breathe that in, it can cause permanent lung damage.
- Durable Knee Pads: Trust me, you'll be on your knees a lot. A quality pair of gel-padded knee pads will make a huge difference, saving you from serious pain and bruising.
A Critical Note on Older Homes: If your house was built before the 1990s, there's a chance the flooring or the black mastic adhesive underneath contains asbestos. Disturbing it releases dangerous fibers into the air. If you even suspect asbestos might be present, stop work immediately and call a professional for testing and proper abatement. This is one hazard you should never handle as a DIYer.
The Right Tools for the Job
Once you're geared up for safety, you can turn your attention to the tools that will make the actual demolition work bearable. What you need really depends on the scale of your project and the kind of subfloor you're dealing with.
Deciding what to buy, rent, or borrow can be tricky. This table breaks down the essentials from the nice-to-haves to help you build the perfect toolkit for your job.
Essential vs Optional Tools For Tile Removal
| Tool Category | Essential Tools | Optional (But Helpful) Tools |
|---|---|---|
| Safety Gear | Impact-Rated Safety Goggles, Heavy-Duty Gloves, N95/P100 Respirator, Knee Pads | Steel-Toed Boots, Hearing Protection |
| Hand Tools | 3-lb Sledgehammer (Drilling Hammer), Cold Chisel, Sturdy Pry Bar, Floor Scraper | Grout Removal Tool, Utility Knife, Trowel |
| Power Tools | None for very small jobs (e.g., a few backsplash tiles) | Rotary Hammer with Chisel Bit, Angle Grinder with Diamond Cup Wheel, Shop-Vac with HEPA filter |
| Prep & Cleanup | Plastic Sheeting, Painter's Tape, Heavy-Duty Trash Bags or Contractor Bags, Buckets | Box Fan for ventilation, Broom and Dustpan |
As you can see, you can get started with just a few key hand tools, but power tools become essential as the job gets bigger.
For a small job, like a little bathroom backsplash or a tiny entryway, you can usually get by with the basics. A 3-lb sledgehammer—often called a drilling hammer—paired with a good cold chisel or a solid pry bar gives you the force and leverage needed to pop those tiles free.
But for larger floor areas, power tools are a game-changer and a real back-saver. The pros reach for a rotary hammer with a chisel attachment for a reason: it makes ridiculously fast work of both the tile and the thin-set on concrete subfloors. It's a pricey tool to buy, but many home improvement stores rent them out, which is a fantastic option for a one-off project. An angle grinder fitted with a diamond cup wheel can also be a lifesaver for grinding down stubborn mortar residue after the tiles are gone.
This focus on having the right tools for demolition is a big part of the home renovation industry. In fact, the market for related products, like surface prep and cleaning materials, reflects just how much renovation is happening worldwide. The tile cleaner market alone was valued at around USD 2.8 billion in 2023 and is projected to hit USD 4.2 billion by 2032. This growth is fueled by home improvement projects that almost always start with tearing out the old stuff. You can dive deeper into these trends in this detailed report about the tile cleaner market.
How to Prep Your Room for Demolition Day
Before you even think about swinging a hammer, let's talk about dust. The dust from removing ceramic tile is legendary—it's fine, gritty, and will coat every single surface in your home if you give it a chance. A little prep work now will save you from days of cleaning later. Trust me on this one.
First things first, you need to create a sealed-off work zone. This isn't optional. Get yourself some 4-mil or 6-mil plastic sheeting. You'll want to drape it over anything that can't be moved out of the room, like cabinets, countertops, toilets, or tubs. For doorways, create a solid barrier by taping the sheeting from the top of the door frame all the way to the floor, sealing every edge with painter's tape.
Creating an Airlock for Dust Control
If you really want to keep the mess contained, build a simple airlock at the main entrance to the room. Just hang a second sheet of plastic a few feet outside the first one. This time, only tape the top edge securely, then cut a vertical slit down the middle so you can walk through. This double-barrier setup is incredibly effective at trapping airborne dust before it escapes into the rest of the house.
Don't forget the air vents. Shut them tight and then tape plastic sheeting over them completely. This is critical—it stops that fine silica dust from getting sucked into your HVAC system and blown into every room.
Here’s a pro tip that’s easy to overlook: protect your floors outside the demo zone. Dust doesn't just float; it gets tracked everywhere on your shoes. Lay down a path of rosin paper or a few old towels from the room you're working in to your main exit. It makes a huge difference.
Clearing the Area and Protecting Belongings
Now it's time to get everything movable out of the room. That means furniture, rugs, wall art—anything that isn't bolted down. For bigger pieces, knowing how to store furniture properly during a renovation is key to preventing scratches and damage. This is just as true for commercial spaces like offices or warehouses where protecting assets during a remodel is non-negotiable.
For property managers and business owners, this prep stage is the perfect opportunity to decide what isn't coming back. Setting aside a dedicated spot for debris right from the start makes the whole project feel more organized and simplifies the final haul-away.
This is where planning your disposal strategy becomes so important. For our commercial clients—from offices to property managers and warehouses—Fulton Junk Removal offers a seamless solution. Operating under Beyond Surplus, we provide a circular, eco-friendly approach that goes beyond traditional junk hauling. While Fulton handles junk removal, Beyond Surplus ensures responsible recycling, making compliance and sustainability reporting easier. It’s an efficient way we handle cleanouts across all our Atlanta-area service locations. From prep to disposal, your project is handled professionally, with a commitment to keeping as much as possible out of the landfill.
A Practical Guide to Removing Ceramic Tiles
With the room prepped and your tools laid out, it's time for the main event: ripping out those old ceramic tiles. This is where the real work—and the real dust—begins. The right technique will save you from a gouged-up subfloor, wasted energy, and a whole lot of frustration. Don't fall for a one-size-fits-all approach; how you tackle this job depends entirely on what’s hiding underneath those tiles.
Getting Started: Making Your First Move
Your first goal is simple: get that first tile out. It’s the key that unlocks the rest of the floor or wall. Scan the area for an easy target—a tile that’s already cracked, feels loose underfoot, or makes a hollow sound when you tap it with a screwdriver handle. Those are the weak links in the chain.
If no tile is giving up easily, you’ll have to create your own opening. A common mistake is just smashing a tile in the middle of the room, which is a great way to damage the subfloor. A much better strategy is to grab a grout removal tool or a sturdy utility knife and score the grout lines around a single tile. This isolates it from its neighbors and minimizes collateral damage.
Once the grout is cleared, grab your hammer and cold chisel. Angle the chisel tip into the cleared grout line at about a 30 to 45-degree angle. A few solid taps with the hammer should be enough to pop the edge of the tile up. That's your entry point.
The prep work you did earlier is what makes this part go smoothly.
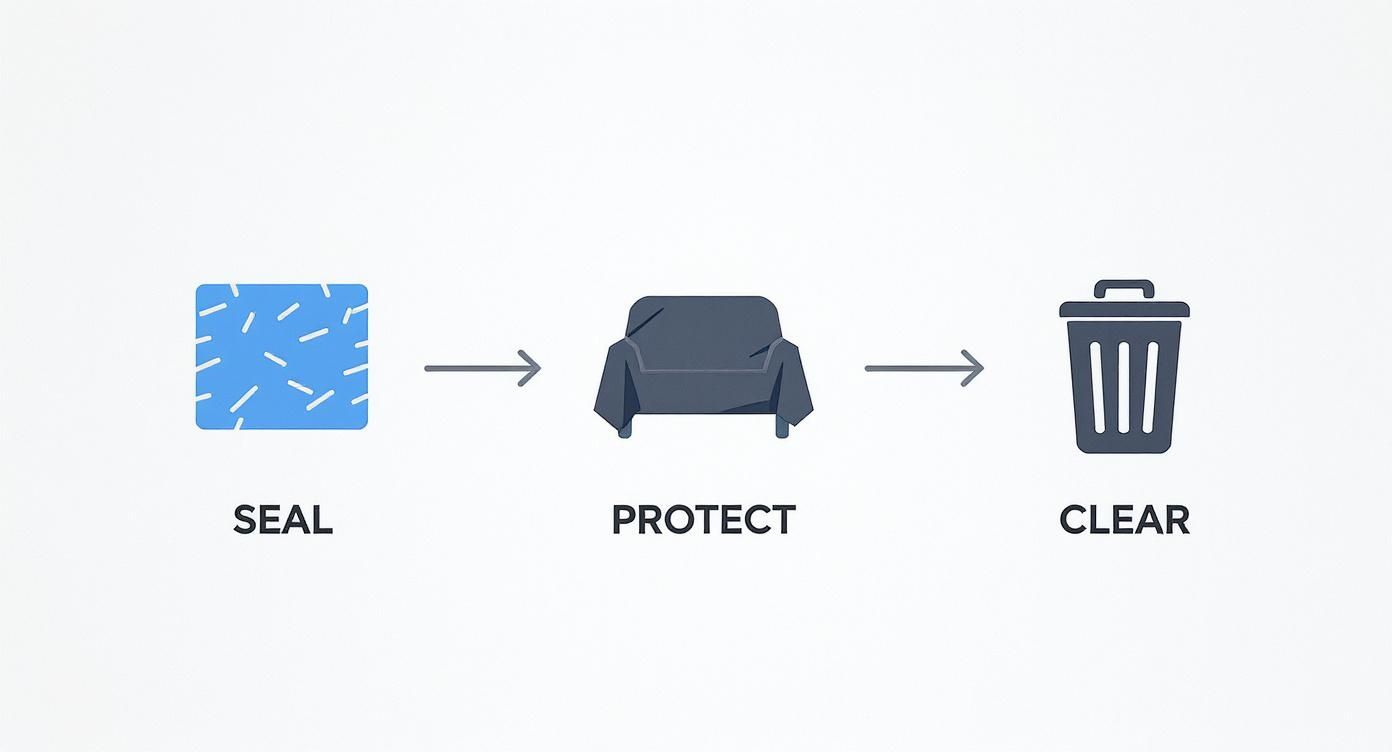
This quick visual guide really hammers home the importance of sealing off the area, protecting what's left, and clearing the space. It’s the foundation for a demolition day that’s more controlled and less chaotic.
Removing Floor Tiles From Concrete Subfloors
Working on a concrete slab is usually the most straightforward scenario you can hope for. Concrete is tough and can take a beating, so you can get a bit more aggressive without worrying about causing serious damage.
After you get that first tile out, work your way outward. Wedge your chisel into the new gap under an adjacent tile. The trick here is leverage. You're not trying to shatter the tile into a million tiny shards; you want to get underneath and pop it off in big chunks or, if you're lucky, whole pieces.
A rotary hammer with a wide chisel bit is your best friend on a concrete floor. It delivers the perfect mix of impact and prying force, making short work of even the most stubborn, well-bonded tiles. Just keep the tool at a low angle and let its weight do the heavy lifting.
Tackling Tiles On a Plywood Subfloor
Plywood demands a lighter touch. It’s much softer than concrete, and going at it too hard with a hammer and chisel can easily gouge, splinter, or even punch holes straight through the wood. That just means you've created a whole new repair job for yourself down the line.
For plywood, it's often better to stick with hand tools like a wide floor scraper or a pry bar. Use slow, steady pressure to work under the tiles. If you must use a power tool, be extremely careful and keep it at the lowest possible angle to avoid digging into the subfloor.
Here's a pro tip: Listen while you work. The sound your chisel makes will tell you a lot. A sharp, high-pitched ring means the tile is bonded tight. A dull thud, on the other hand, often signals a hollow spot where the mortar is weak. These hollow spots are your path of least resistance.
The Unique Challenges Of Wall Tile Removal
Pulling tiles off a wall introduces its own set of problems, mainly because the substrate—usually drywall or cement backer board—is far more delicate than a floor.
First things first: shut off the power and water to the area. Then, remove any obstacles like electrical outlet covers, light switch plates, and plumbing fixtures such as showerheads or faucet handles.
When you're dealing with drywall, some damage is almost inevitable. The thin-set mortar often bonds more strongly to the paper face of the drywall than the paper does to the gypsum core. As you pry off tiles, you’ll likely rip off chunks of paper and gypsum along with them. Just plan on doing some drywall repair once the demo is done.
If the tiles were installed over a cement backer board, you’re in luck. This material is way more durable and can handle the removal process much better. You can be a bit more forceful, but always work cautiously around plumbing pipes to avoid a costly mistake. For more project ideas and renovation tips, check out the other articles on our official Fulton Junk Removal blog.
Tackling What The Tiles Leave Behind
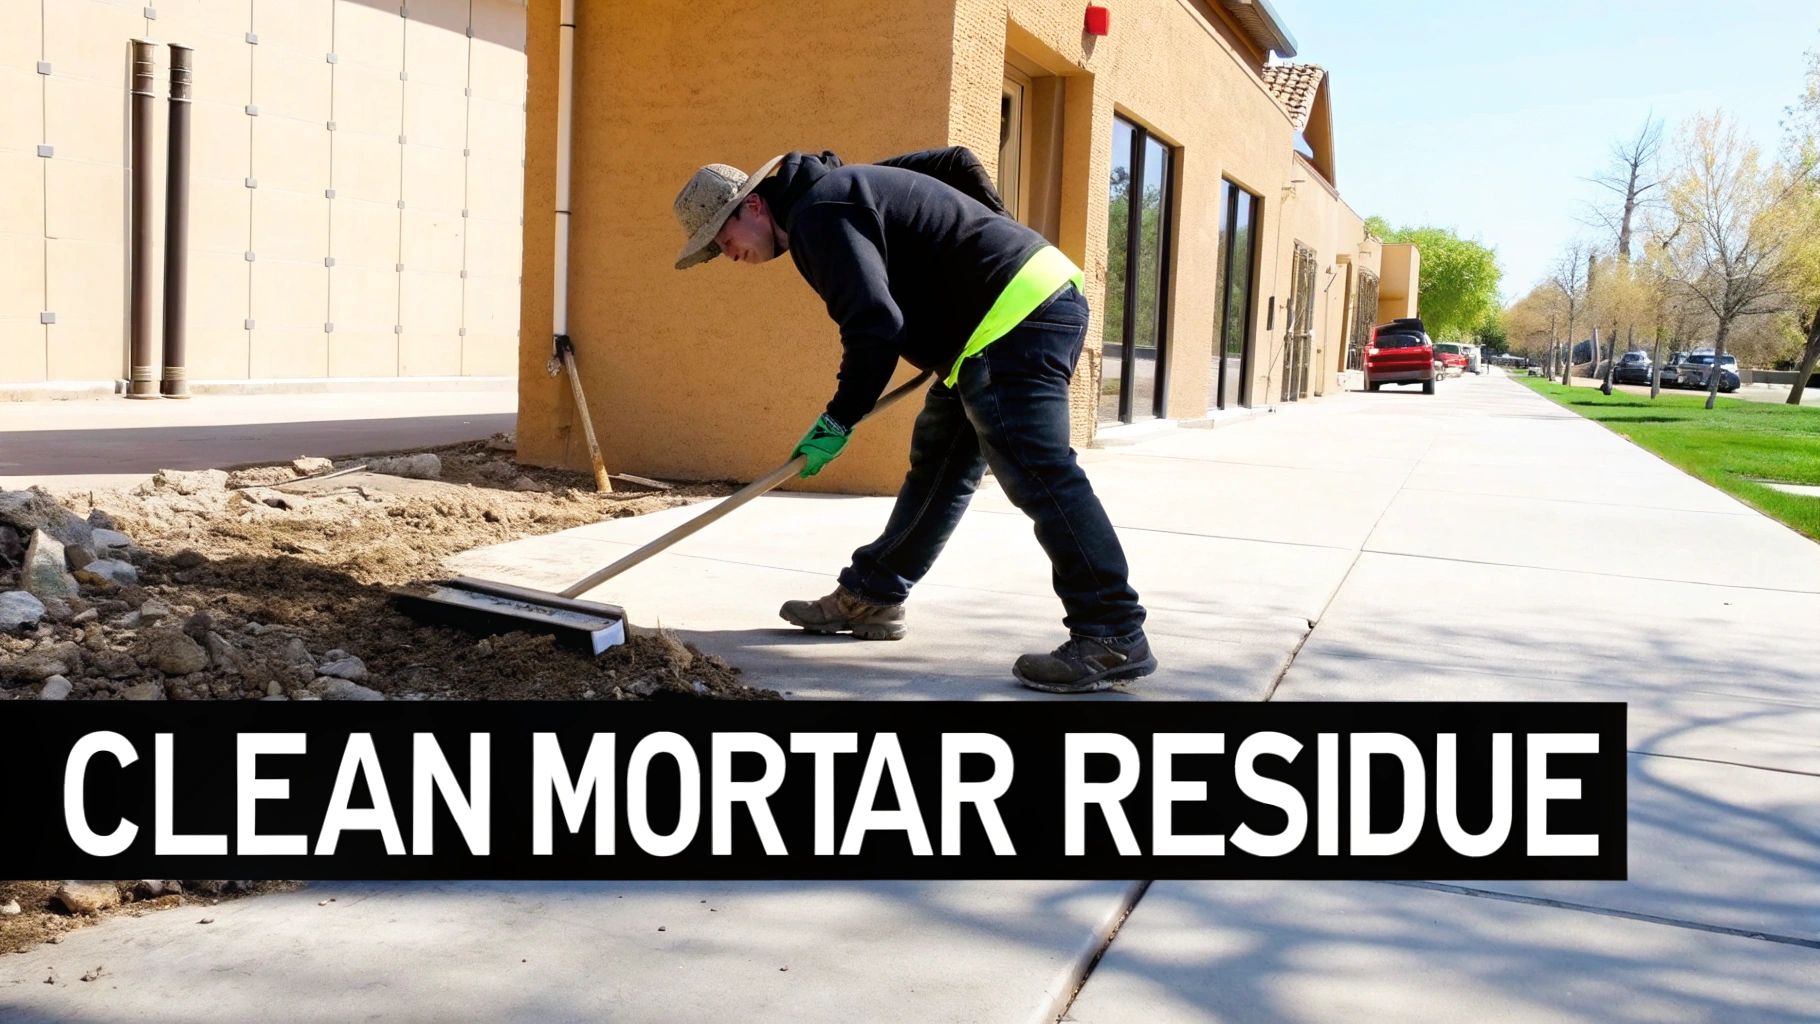
Getting that last tile off the floor feels like a huge win, but don't celebrate just yet. The real challenge has just begun. You're now looking at a battlefield of old thin-set mortar or tile adhesive, and getting a perfectly flat, clean surface is non-negotiable for whatever flooring comes next. This is one step you absolutely cannot afford to skip.
How you clear this mess depends entirely on what’s underneath—a concrete slab or a plywood subfloor. One calls for brute force, while the other requires a careful, patient touch to avoid expensive damage.
Clearing Mortar From Concrete Subfloors
Concrete is tough. That's great news because it means you can be aggressive at this stage without much risk. The goal is to knock down the high ridges and thick chunks of old mortar without spending all weekend on your hands and knees.
For small jobs or minor patches, you might get away with a long-handled floor scraper. Just make sure it has a sharp, heavy-duty blade. Put your weight into it and keep the angle low to chip away at the mortar.
But for most projects, especially entire rooms, it’s time to bring in the power tools. An angle grinder with a diamond cup wheel is what the pros use, and for good reason. It chews through stubborn thin-set quickly, leaving you with a smooth surface that’s ready for the new floor.
Just remember a few critical safety tips when you fire up the grinder:
- Dust Control is a Must: This thing creates a massive cloud of fine silica dust. Always connect the grinder to a shop vac with a HEPA filter and wear your N95 or P100 respirator.
- Keep It Moving: Don't let the grinder rest in one spot. Use wide, sweeping motions like you’re buffing the floor to avoid gouging the concrete.
- Gear Up: Wear your safety glasses, gloves, and hearing protection. The noise and vibration are no joke.
After grinding down the old mortar, you might discover your subfloor isn't perfectly level. Even concrete slabs can have low spots. Our guide on how to level uneven floors offers some solid DIY advice for tackling this crucial next step.
Removing Adhesive From Plywood Subfloors
Plywood is a completely different animal. It’s a softer material, and you can easily gouge, splinter, or delaminate it if you get too aggressive. An angle grinder is definitely out—it would absolutely shred the wood.
Here, your go-to tools will be a mix of scrapers, chisels, and a hammer. A 4-inch floor scraper is the best place to start. Keep the blade sharp and work carefully to lift the old adhesive without digging into the wood.
For those extra-stubborn patches of thin-set, you'll need a hammer and a wide, flat chisel. Hold the chisel almost parallel to the floor and tap it gently to shear the mortar off the wood. It takes patience, but it’s the only way to protect the integrity of your subfloor.
This cycle of renovation is a constant in our industry. In the first quarter of 2025 alone, U.S. ceramic tile consumption hit 651.2 million square feet, a 4.6% increase from the year before. This reflects a huge renovation market where removing old tile—and cleaning up the mortar—is a routine job before new floors can go down.
No matter your subfloor type, the final phase is a deep clean. Once all the scraping and grinding is done, grab a shop vacuum and get every last bit of dust and debris. This ensures your new flooring adhesive gets a perfect bond and your project has a professional finish. To learn more about our commitment to responsible practices, read about Fulton Junk Removal and our partnership with Beyond Surplus.
Smart Debris Disposal and Eco-Friendly Options
Okay, you've done the hard part. The last stubborn tile is out, and the subfloor is finally breathing again. But now you're left with the evidence—a heavy, sharp pile of broken ceramic, old thinset, and grout.
Your first thought might be to drag it all to the curb, but that’s the old way of thinking. Today, a smarter, more sustainable approach sees this debris not as trash, but as a resource. Instead of adding to the 292 million tons of municipal solid waste generated in the U.S. each year, you have better options.
Beyond the Landfill: A Circular Approach
Most junk removal companies take everything to the landfill. At Fulton Junk Removal, we recycle through our partner, Beyond Surplus, to minimize waste and maximize reuse. This appeals to environmentally conscious homeowners and businesses alike.
Fulton Junk Removal works hand-in-hand with Beyond Surplus to recycle electronics, metals, and other materials responsibly. We are focused on commercial services, operating under Beyond Surplus as a circular, eco-friendly solution that goes beyond traditional junk hauling. We divert items from landfills, ensuring they’re repurposed or recycled.
Our mission is simple: transform waste management from a one-way trip to the dump into a sustainable cycle. Fulton Junk Removal does the heavy lifting, while Beyond Surplus ensures every recyclable item is processed responsibly, not just discarded.
This integrated approach is a game-changer, especially for our commercial clients. If you're a property manager, office manager, or warehouse operator, you know that managing waste streams and hitting sustainability targets can be a logistical nightmare. We make it easy.
Integrated Services for Commercial Needs
Picture a large office renovation. The project creates a mix of tile and construction debris, but also piles of outdated electronics, old furniture, and metal fixtures. Juggling separate vendors for junk hauling, e-waste recycling, and other disposals is a headache you don't need.
Fulton Junk Removal can offer a bundled junk removal and recycling pickup, where all electronic waste and recyclable materials are directly processed by Beyond Surplus.
This gives businesses a few key advantages:
- Simplified Compliance: For offices, warehouses, and property managers, Fulton handles junk removal, and Beyond Surplus ensures responsible recycling, making compliance and sustainability reporting easier.
- Enhanced Corporate Responsibility: Partnering with us is a tangible way to show your commitment to environmental stewardship—something that resonates with today's clients and employees.
- Operational Efficiency: One call handles it all. We’ll haul away heavy demolition waste and make sure sensitive electronics are recycled securely and ethically.
Whether you're overseeing a multi-unit turnover or coordinating a massive office cleanout, our combined services make responsible disposal the path of least resistance.
Debris Disposal Options Comparison
So, what's the best way to get rid of all that tile debris? The right choice really depends on the size of your project, your budget, and how much you value your time and the environment. Here’s a look at the pros, cons, and costs of different methods for getting rid of tile demolition waste.
| Disposal Method | Best For | Pros | Cons |
|---|---|---|---|
| DIY Hauling to Landfill | Tiny projects with just a few broken tiles. | The lowest direct cost if you already own a truck. | Time-consuming; requires a suitable vehicle; huge environmental impact. |
| Bagster or Dumpster Bag | Small to medium residential DIY projects. | Convenient for on-demand pickup; fits easily in a driveway. | Strict weight and volume limits; gets expensive fast with heavy debris like tile. |
| Dumpster Rental | Large-scale renovations and commercial jobs. | Handles massive volumes of heavy materials with ease. | Can be very costly; requires a lot of space; you still have to do all the loading yourself. |
| Fulton Junk Removal | All project sizes, especially those with mixed types of debris. | Full-service loading (we do the work); eco-friendly disposal through Beyond Surplus; bundled recycling options. | Higher initial cost than DIY, but it saves you a ton of time, labor, and back pain. |
Ultimately, choosing a professional service that puts recycling first is an investment in both convenience and sustainability. When you're ready to clear out the aftermath, you can explore the full range of Fulton Junk Removal's professional hauling and cleanout services and let us handle the mess while you move on to the fun part of your renovation.
Common Tile Removal Questions Answered
Even the most straightforward tile removal project can throw you a curveball. You’re bound to hit a snag or wonder if you’re doing something the right way. Below, I’ve tackled some of the most common questions that pop up on almost every job, based on years of hands-on experience.
How Long Does It Take to Remove Ceramic Tiles?
This is the million-dollar question, and the honest answer is: it depends. For a typical 150-square-foot room, a dedicated DIYer should probably block out a full weekend. Plan for somewhere between 8 and 16 hours of solid work, but know that a few key things can dramatically speed up or slow down your progress.
The biggest factors are:
- What’s holding them on? Tiles stuck down with a gooey mastic adhesive usually pop off much faster than those set in rock-solid, cement-based thin-set mortar.
- What’s underneath? You can be more aggressive and move quicker when you’re breaking tiles off a tough concrete slab. If you’re trying to save a plywood subfloor underneath, you’ll need to work more carefully and methodically.
- Your tools make a huge difference. Trust me, renting a rotary hammer with a wide chisel bit can literally cut your demolition time in half compared to swinging a hammer and chisel by hand.
Can I Remove Ceramic Tiles Without Breaking Them?
It's a nice idea in theory, but in the real world, it's almost impossible. If the tiles were installed correctly, that thin-set mortar creates a permanent bond. The tile is designed to shatter before that bond lets go.
If you absolutely have to save a specific tile for a future repair, your only shot is to use a grout removal tool to completely isolate it from its neighbors. Then, very patiently, try to slide a stiff putty knife or a small pry bar under an edge. Apply slow, even pressure and hope for the best. Even then, expect most of them to crack.
Heads Up: If your home was built before the 1990s and you uncover a thick, black, tar-like adhesive, stop work immediately. This stuff often contains asbestos, which is dangerous when it becomes airborne. You'll need to get it professionally tested and removed.
Is It Better to Tile Over Existing Tile?
I’m going to be blunt: tiling over old tile is a shortcut that almost always comes back to haunt you. It might seem like a brilliant time-saver, but pulling up the old layer is the only way to guarantee your new tile job looks good and lasts for years to come.
Here's why taking the shortcut is a bad idea:
- You'll create height problems. An extra layer of tile and mortar makes the floor noticeably thicker. This creates awkward, clumsy transitions between rooms and can stop doors from swinging freely.
- You’re building on a questionable foundation. You're betting that every single one of the old tiles is perfectly level and bonded tightly. If even one is loose or cracked, it becomes a weak spot that will eventually cause your new tiles to fail.
Ripping out the old stuff lets you see what you’re really working with. You can inspect the subfloor, fix any damage, and start with a clean, solid base for your new installation.
And when you’ve got that pile of broken tile and old mortar ready to go, we can help. Get in touch with our team for a fast, free estimate by visiting our contact page.